"FLEDGLING"
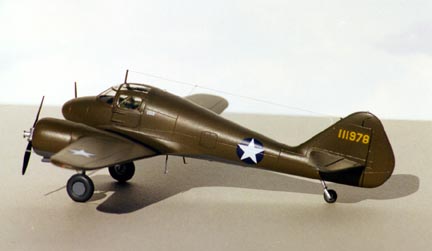
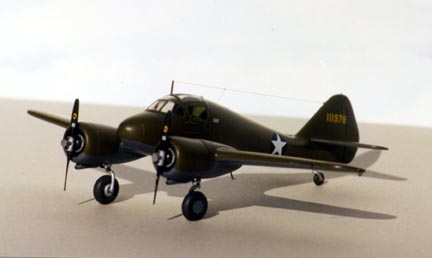
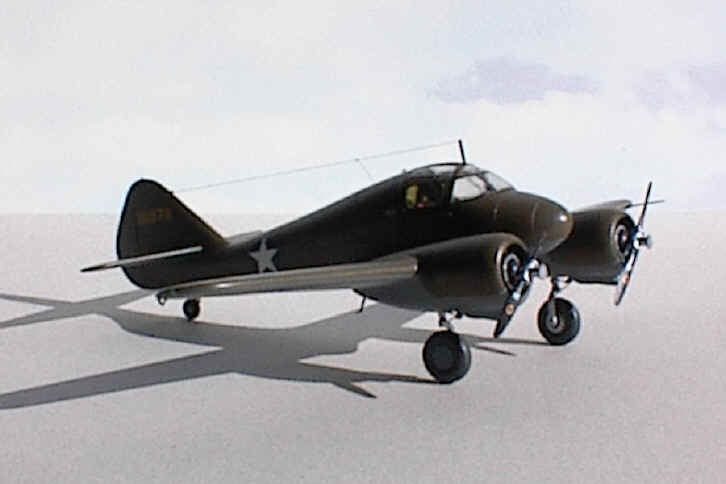
CURTISS-WRIGHT AT-9 "FLEDGLING"
USAAF - 1941
Model Subject: Curtiss-Wright AT-9 "Fledgling"
Kit Used: Pavla, kit no. 72013
History of the aircraft modeled:
In 1940, with Europe already at war, the U.S. Army knew that it was essential to begin preparation for the very real possibility that the United States of America would soon become involved. As part of this thinking the U.S. Army had already begun evaluation of the Cessna T-50 as an "off-the-shelf" twin-engine trainer, which would prove suitable for the transition of a pilot qualified on single-engine aircraft to a twin-engine aircraft and its very different handling techniques. Procured as the "AT-8", Cessna's T-50 was ordered in large numbers.
For the more specific transition to a 'high-performance' twin-engine
bomber, it was considered that something less stable and a little 'hotter' was required.
Curtiss-Wright has already anticipated this requirement and designed the Curtiss-Wright
CW-25, a twin-engine trainer, which possessed the takeoff and landing characteristics
of a light bomber aircraft. The CW-25 was of a low-wing cantilever monoplane
configuration, provided with retractable landing gear and powered by two Lycoming R-680-9
radial engines. The single prototype acquired for evaluation has a steel-tube fuselage
with the wings, fuselage, and tailplanes fabric-covered.
Evaluation proving satisfactory, the type was ordered into production
under the designation "AT-9. Named the "Fledgling" by Curtiss-Wright. It
took on the more common name "Jeep" in the USAAF. The production examples
differed from the prototype in being of an all-metal construction. A total of 491 AT-9
were constructed, with a further 300 four-seat AT-9As built before production was ceased
in 1943.
Specifications
Span: 40 ft. 4 in.
Length: 31 ft. 8 in.
Height: 9 ft. 10 in.
Weight: 6,062 lb. loaded
Armament: None
Engines: Two Lycoming R-680-9s of 295 hp. each
Crew: Two
Cost: $34,900
Performance
Maximum Speed: 197 mph.
Cruising Speed: 173 mph.
Range: 750 miles
Service Ceiling: 19,000 ft.

BUILDING THE MODEL
Interior:
The cockpit is quite complete given all the Eduard photoetched goodies on the fret. The only thing missing was sidewall detail, which was sparse even in the real aircraft. I made templates of the outside side door and mark off the openings on the interior using the template and a .005 tech pen and India ink. I also scratch-built two carryall bags for each door using the kit's instructions as a reference.
The basic interior color was Interior Green. Control wheels, consoles, and plaques were done in black. The seats were painted leather and the belts painted dirty white, with the buckles lightly sanded to clean the paint and show the metal. The interior need a good deal of sand and fit before committing oneself to glue, but it sands easily and I had it all done in less than an hour. The resulting finished cockpit is spectacular.
Engines:
The engines and propeller blades are done in resin and well done at that. The blades were cleaned up and cemented to the injected molded spindles. The blades were painted black with the spindles painted chrome silver. Be prepared to get your motor-tool of choice out and cut away some of the interior of the engine cowlings, so that the resin engines will fit properly. Another option would be to simply sand the outside of the resin engine cylinders, but I didn't want to remove all that beautiful detail.
The engines were painted engine gray with the cylinders brushed in oxidized aluminum and the pushrods painted black. I scratch-built the exhaust collector ring from non-flux solder. It was painted Gunze Burnt Iron. Exhaust stub cemented in the final assembly were also non-flux solder painted burnt iron.
Exterior:
Nothing except for the Waldron punched disks of Bare-metal foil and the drops of Krystal Klear done to represent the wing and fuselage navigation and formation lights. All photoetched pieces (steps, aileron control rods, and antenna) were cleaned and set aside until final assembly. I had to replace the antenna, as the kit's photoetched piece would never hold well enough for my invisible thread aerial wiring. I replaced it with .025 copper wire. The vacuform canopy fit very well, I only had a small step at the rear and a small fill on the starboard front, but all went well.
Painting and decaling:
The model was primed in AeroMaster Neutral Gray, which is the undersurface color for the camouflage version that I chose to do; after five straight natural metal models, I was ready for a change. The undersurface was masked and the uppersurfaces painted AeroMaster Olive Drab. After two coats of FUTURE, the model was ready for decals.
Decals from the kit were used with exception of the National Insignia, which came from SuperScale's sheet number 72-17. The kit's insignia are the correct size and opaque enough, but the blue is too dark. After cleaning, applying ink washes, and a cover coat FUTURE, the model was given a finish coat of clear flat.
I would like to thank Jerry Campbell and the crew at Squadron Mail Order for the opportunity to built this kit.
Article and photos copyright Caz Dalton