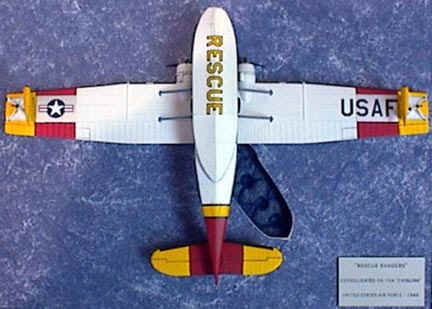
"RESCUE RANGERS"
CONSOLIDATED OA-10A "CATALINA"
UNITED STATES AIR FORCE - 1948
Model Subject: Consolidated PBY-5A (OA-10 USAAF & USAF) "Catalina"
Kit Used: MINICRAFT/USA, kit number 4435.
History of the aircraft modeled:
Just before Pearl Harbor the U.S. Army got back into the flying boat business in a big way, acquiring the first of 56 PBY-5As (Patrol Bomber Consolidated - 5th series - Amphibian) from the U.S. Navy as OA-10s (Observation Amphibian - 10th aircraft type). These were to be used primarily for search and rescue work.
When more were needed in 1944, the entire production of 230 PBY-5As to be built for the Navy by Canadian Vickers as PBV-1s was released to the Army. These became OA-10As.
In 1945 the Army purchased 75 of the improved PBY-6As built by Consolidated as OA-10Bs. At the end of 1948 the new U.S. Air Force dropped the OA designation and simply used A, while retaining the original model numbers. They served in search and rescue work until replaced by the Grumman SA-16 "Albatross" in the mid 1950s.
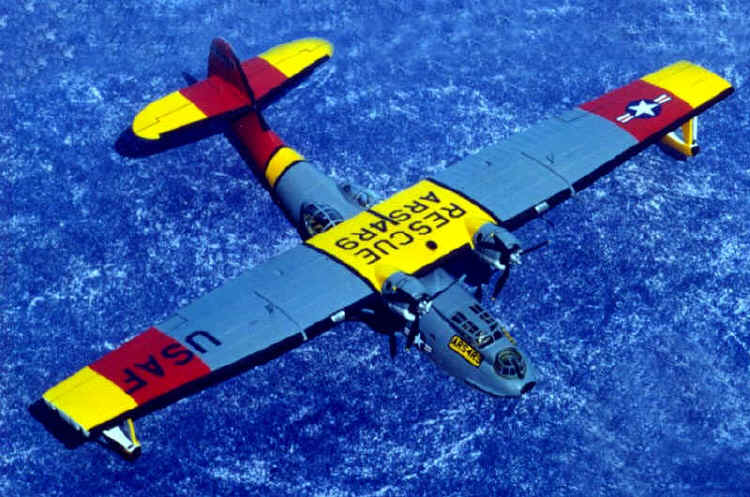
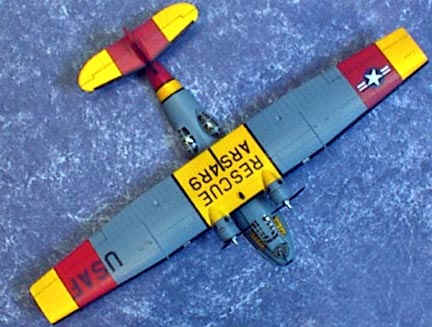
My model represents one of the PBY-5As built by Canadian Vickers and used by the USAAF and USAF for search and rescue work as OA-10As. It is painted in early 1948 markings before the USAF changed OA-10A to A-10A. Soon these became SA-10As (Search Amphibian), when the Air Force reserved the A for Attack aircraft.
Additions, modifications, etc.:
Interior:
Nothing was done to the cockpit or bow turret areas with exception of adding minute masking tape seat belts. The area inside of the waist glass blisters was treated to a little scratch building with sheet plastic. I built a bulkhead just ahead of the blister openings, installed a floor with two semi circle gun stands, and added shields for the kit guns. As a rule, however, most OA-10s used after the war were unarmed, I just couldn't help adding the wonderfully molded kit guns.
The interior was painted interior green and a couple of Reheat Models Control decals were applied to each fuselage side in the cockpit area. The instrument panel was simply brushed painted flat black and given some drops of FUTURE for the gauges.
Exterior:
The kit comes with the option of assembling the gear up or down. I decided on doing the gear up, but I'll have more on that later. The exterior was assembled out-of-the-box, with exception of drilling out the exhaust ports and adding exhausts of styrene rod that had been thinned with a cone-shaped Dremel cutting bit. I also added a few antennas with bits of thin wire and replaced the kit's pitot with the end of a straight pin. I could find no suitable photos showing the location of aerial wires or fuselage navigation lights. If any of you fellow IPMS members can help, I would like to string the model and attach the lights.

Painting and Decaling:
After masking the clear areas with Bare-metal foil and painting the frames interior green, I primed the fuselage, wing, horizontal tailplanes, floats, wheels, and small bits in flat white. I sprayed on about five light mist coats allowing each to dry about five minutes. One hour later I followed with two color coats of white and finally achieved the finish I desired.
Once I had sanded the primed surfaces and reprimed, I masked all surfaces saving those to be painted yellow. The unmasked areas were given two coats of flat insignia yellow. I next removed the masking and proceeded to mask all areas not to be painted red. The unmasked areas were then shot with two coats of flat insignia red. I again removed all the masking and remasked all areas not to be painted blue. I then sprayed the fuselage and wing with U.S. Navy blue-gray. After removing all masking save for the clear areas, I gave the entire model a coat of clear gloss.
I used the kit's USAF decals, tail number decals, and fuselage call sign decals. I replaced the national insignia decals with some from SuperScale as the white was too translucent in the kit's decals. I also used the kit's side stripe decal and it was here that I found out that the yellow was too translucent too. Even after adding an additional yellow stripe cut from yellow trim film, I still had to carefully paint the stripe with two wet coats of insignia yellow before I achieved the correct color. Learning from this I cut two blank sheets from white trim film and attached them to the fuselage before attaching the call sign decals. The upper wing RESCUE and ARS 4R9 were cut from SuperScale's 1/72nd scale letter sheet. All de-icing covers were done with black decal film and touched up with flat black paint. Silver areas on the underside of the wings and on the vertical tailplane were cut from silver trim film. Float retraction slots were also done with black trim film.
Once the decals had dried I washed the model and gave it another coat of clear gloss. I next applied an ink wash to all control surfaces and lightly dusted the exhausts with black-powdered pastel. The parts were lastly given a coat of clear flat and the Bare-metal masking was removed. After polishing out the adhesive residue, I gave the clear areas a coat of FUTURE. Search and landing lights were simply done with Bare-metal chrome foil and given a coating of FUTURE. Small navigation lights on the floats were done with bright silver paints, drops of Kristal Kleer, and clear red on the port float with clear green on the starboard float.
A bit about the base:
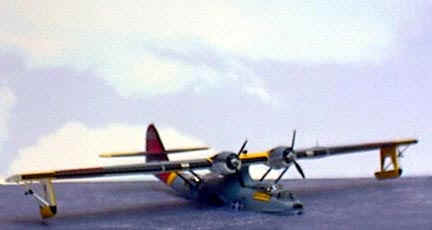
I had originally planned to build this kit in the gear down position. However the difficulty involved in aligning the fragile kit parts proved even too much for my patience, so I said 'bug it' and decided I would do the model in the in-flight position. When I could not come up with any 1/144-scale figures, I decided I would do the model, as it would appear in the water at rest, save for the anchorage. I had thought of using thin Plexiglas for my water and made a template for the waterline cutout of some blue-marble posterboard. While putting the model into the template as I sanded for the proper fit, I was amazed at how well the model looked in the posterboard. As you can see, I now have a scratch-free mount for a unique display base. It can be lifted out with ease for judge inspection and nestles down easily when put back.
Article and photographs © Caz Dalton, May 2000